Creating Azure Active Directory Service Principal Using PowerShell
$subscriptionID = "<your subscription ID GUID>"

$rootNameValue = "mvazureasdemo"

$servicePrincipalName = "$($rootNameValue)serviceprincipal"
$servicePrincipalPassword = Read-Host `
    -Prompt "Enter Password to use for Service Principal" `
    -AsSecureString

Write-Output "Selecting Azure Subscription..."
Select-AzureRmSubscription -Subscriptionid $subscriptionID
# Get the list of service principals that have the value in
# $servicePrincipalName as part of their names
$sp=Get-AzureRmADServicePrincipal `
            -SearchString $servicePrincipalName

# Filter the list of just the ONE service principal with a DisplayName
# exactly matching $servicePrincipalName
$mysp = $sp | Where{$_.DisplayName -eq $servicePrincipalName}

# Isolate the ApplicationID of that service principal
$appSPN = $mysp.ApplicationId
# Create a service principal if it does not exist
Write-Output "Creating Service Principal $servicePrincipalName..."

try
{
    If(!($appSPN))
    {
        New-AzureRmADServicePrincipal `
            -DisplayName $servicePrincipalName `
            -Password $servicePrincipalPassword

        # Sleep for 20 seconds to make sure principal is propagated in Azure AD

        Sleep 20

    }
    Else
    {
        Write-Output "Service Principal $servicePrincipalName already exists."
    }
}
catch
{
    Write-Error -Message $_.Exception
    throw $_.Exception
}
# Assigning Service Principal $servicePrincipalName to Contributor role
Write-Output "Assigning Service Principal $servicePrincipalName to Contributor role..."

try
{
    If(!(Get-AzureRmRoleAssignment `
            -RoleDefinitionName Contributor `
            -ServicePrincipalName $appSPN `
            -ErrorAction SilentlyContinue))
    {
        New-AzureRmRoleAssignment `
            -RoleDefinitionName Contributor `
            -ServicePrincipalName $appSPN
    }
    Else
    {
        Write-Output "Service Principal $servicePrincipalName already `
                        assigned to Contributor role."
    }
}
catch
{
    Write-Error -Message $_.Exception
    throw $_.Exception
}
Assign Service Principal to Administrator Role on Azure Analysis Services Server
app:<Application ID>@<Azure tenant ID>
Azure Automation Modules
If you don’t already have an Azure Automation account, you can follow the steps here to create one. PowerShell cmdlets are grouped together in Modules that share certain context. For example, Modules that are intended for management of SQL Servers are grouped together in the SqlServer module. Whether it be on your computer for use in the PowerShell ISE or in Azure Automation, the use of cmdlets is only possible when the Modules that contain those cmdlets are installed. You can read more about installing Modules here. For the purposes of processing Azure Analysis Services models with Azure Automation, it will be necessary to install the Azure.AnalysisServices and SqlServer modules in your Automation account. Note that each of those pages includes a Deploy to Azure Automation button.
Azure Automation Basics
Azure Automation allows you to execute scripts against your Azure environment. The components that perform the work, that contain the scripts, are called Runbooks. There are a few different scripting languages supported (including Python, which is now in Preview). For this process, we will use PowerShell Runbooks.
Often, Runbooks will have various parameters or values that are needed at runtime. For example, if you have a Runbook that boots up a virtual machine, you will need to tell it WHICH virtual machine to start, etc. These values can be passed into the Runbooks at runtime as Parameters, OR you can store these values in Assets like Variables and Credentials. For this process, we will be using one Variable Asset and one Credential Asset. Assets allow you to store values once but make those values available across all of your Runbooks, etc. Super cool.
Azure Automation Variable Asset
One value we will need to pass to our Runbook for processing out Analysis Services model is the Tenant ID of our Azure Subscription. This is a GUID that you are welcome to type/paste in every time you want to use it. Or you can hard-code it into your Runbooks that need it. But there is a far better way. You can store it in a Variable Asset. The instructions there show you how to create the variable via the Azure Portal. Since we are already doing PowerShell, let’s stick with it.
# Create function to create variable assets
function CreateVariableAsset
{

    param
    (
      [string] $variableName
    , [string] $variableValue
    )

    Write-Host "Creating Variable Asset $variableName..."

    try{
        If(!(Get-AzureRmAutomationVariable `
            -AutomationAccountName $automationAccountName `
            -ResourceGroupName $automationResourceGroup `
            -Name $variableName `
            -ErrorAction SilentlyContinue))
        {
        New-AzureRmAutomationVariable `
            -AutomationAccountName $automationAccountName `
            -ResourceGroupName $automationResourceGroup `
            -Name $variableName `
            -Value $variableValue `
            -Encrypted $false `
            -ErrorAction Stop

        Write-Host "$variableName created successfully. `r`n"

        }
        Else
        {
            Write-Host "Variable Asset $variableName already exists. `r`n"
        }
    }
    catch
    {
        Write-Error -Message $_.Exception
        throw $_.Exception
    }

}
The PowerShell above creates a Function that includes the necessary script to create an Azure Automation Variable Asset. Creating functions can be super helpful when you need to run the same block of code several times, with only minor changes to parameter values, etc. I created this function when building out a solution that involve a couple dozen Variables. Rather than repeat this block of code a couple dozen times, I created it once and then called it for each Variable I needed to create. This makes for much cleaner and easier to manage code.
$automationAccountName = "AutomationB"
$automationResourceGroup = "AutomationBRG"
$variableTenantIDName = "$($rootNameValue)tenantid"
$varaibleTenantIDValue = "<your Tenant ID GUID>"
First, we need a create a few more PowerShell variables. The first two specify the name and resource group of the Azure Automation account we are using. When creating Azure Automation components via PowerShell, you must specify which Automation account will house the objects, as you can have more than one Automation account.
The next two variables provide the Name and Value of our Variable Asset, respectively.
CreateVariableAsset `
    -variableName $variableTenantIDName `
    -variableValue $variableTenantIDValue
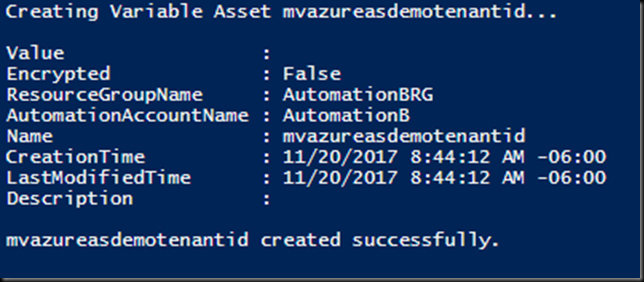
The block above calls our function to create the Variable Asset, if it does not already exist.
Hazzah!
Azure Automation Credential Asset
Since are going to automate use of a Service Principal with a password, we want to store that securely so that our Runbook can get to it without additional intervention. To do that, we use a Credential Asset. That link provides instructions on creating a Credential Asset via the Azure Portal.
# Create function to create credential assets
function CreateCredentialAsset
{

    param
    (
      [string] $credentialName
    , [PSCredential] $credentialValue
    )

    Write-Host "Creating Credential Asset $credentialName..."

    try{
        If(!(Get-AzureRmAutomationCredential `
                -AutomationAccountName $automationAccountName `
                -ResourceGroupName $automationResourceGroup `
                -Name $credentialName `
                -ErrorAction SilentlyContinue))
        {
        New-AzureRmAutomationCredential `
            -AutomationAccountName $automationAccountName `
            -ResourceGroupName $automationResourceGroup `
            -Name $credentialName `
            -Value $credentialValue `
            -ErrorAction Stop

        Write-Host "$credentialName created successfully. `r`n"

        }
        Else
        {
            Write-Host "Credential Asset $credentialName already exists. `r`n"
        }
    }
    catch
    {
        Write-Error -Message $_.Exception
        throw $_.Exception
    }

}
I once again create a Function for the Asset creation.
$credentialServicePrincipalName = "$($rootNameValue)serviceprincipal"
$credentialServicePrincipalUserNameValue = "<your Application ID GUID>"
We need to create two more PowerShell variables; one for the Credential Asset name, another for the Credential Asset User Name value. We will need a Password but we already have that variable from when we created the Service Principal above. We can reuse that same variable so we don’t have to enter in a password again.
# Create a PSCredential object using the User Name and Password
$credentialServicePrincipalValue = `
    New-Object System.Management.Automation.PSCredential`
        (
            $credentialServicePrincipalUserNameValue `
            , $servicePrincipalPassword
        )


# Call function to create credential assets
CreateCredentialAsset `
    -credentialName $credentialServicePrincipalName `
    -credentialValue $credentialServicePrincipalValue
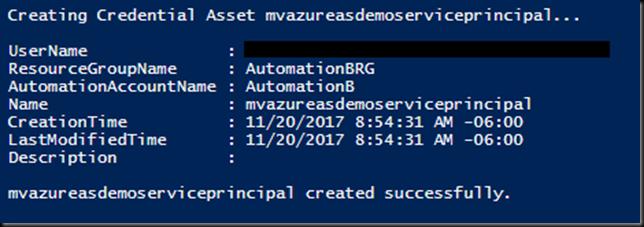
We have to do one extra step here. We start by taking our User Name (Application ID) and Password and using them to create a PSCredential object. Then we call our function to create our Credential Asset.
More Hazzah!
Azure Automation Runbook
As I stated before, Runbooks contain the scripts that perform the work in Azure Automation. You can see how to create a Runbook in the Azure Portal. We will create out Runbook with PowerShell. However, we will not be using PowerShell to actually put the script inside the Runbook. You can do that with PowerShell by importing a saved .ps1 (in the case of a PowerShell runbook) that contains the PowerShell the Runbook will contain. I decided that was more complex than I wanted to get here. Besides, the steps after that take place in the Portal anyway. So, we will create the Runbook using PowerShell and then go to the Azure Portal to edit it and paste in our script.
$runbookName = "$($rootNameValue)processasdatabase"
We start by declaring a PowerShell variable to hold the name for our Runbook.
# Create empty Runbook
Write-Host "Creating Runbook $runbookName..."

try{
    If(!(Get-AzureRmAutomationRunbook `
        -AutomationAccountName $automationAccountName `
        -ResourceGroupName $automationResourceGroup `
        -Name $runbookName `
        -ErrorAction SilentlyContinue))
    {
    New-AzureRmAutomationRunbook `
        -AutomationAccountName $automationAccountName `
        -ResourceGroupName $automationResourceGroup `
        -Name $runbookName `
        -Type PowerShell `
        -ErrorAction Stop

    Write-Host "Runbook $runbookName imported successfully. `r`n"

    }
    Else
    {
        Write-Host "Runbook $runbookName already exists. `r`n"
    }
}
catch
{
    Write-Error -Message $_.Exception
    throw $_.Exception
}
Here we create the Runbook, using our shiny new $runbookName PowerShell variable along with a couple we declared previously.
Hazzah!
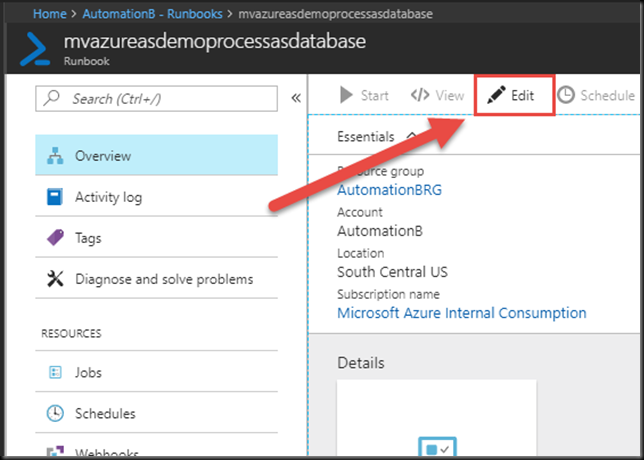
When to go to the Runbooks blade of our Automation account in the Azure Portal, we see our shiny new Runbook. It still has that new Runbook smell.
Clicking on the name of the Runbook will open the Runbook blade. Here we click the Edit button.
Then we past our PowerShell script into the window.
# Get the values stored in the Assets
$TenantId = Get-AutomationVariable -Name "mvazureasdemotenantid"
$Credential = Get-AutomationPSCredential -Name "mvazureasdemoserviceprincipal"

# Log in to Azure Analysis Services using the Azure AD Service Principal
Add-AzureAnalysisServicesAccount `
    -Credential $Credential `
    -ServicePrincipal `
    -TenantId $TenantId `
    -RolloutEnvironment "southcentralus.asazure.windows.net"

# Perform a Process Full on the Azure Analysis Services database
Invoke-ProcessASDatabase `
    -Server "asazure://southcentralus.asazure.windows.net/mvazureasdemoserver" `
    -DatabaseName "AzureASDemo" `
    -RefreshType "Full"
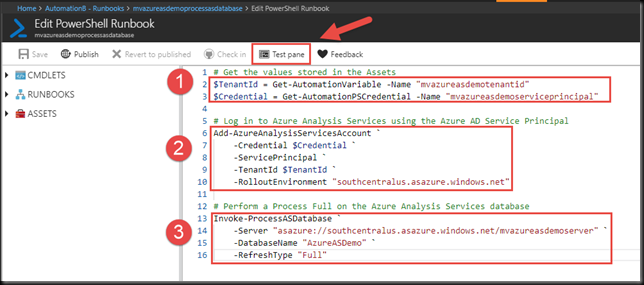
Once we do, it should look like the figure below.
There are a few things to note here.
1. The names in the top section of the runbook must match the names you used when creating the Assets.
2. I am using the Add-AzureAnalysisServicesAccount cmdlet instead of the Login-AzureAsAccount cmdlet Christian used. I had trouble making that one work and more trouble trying to find documentation on it. So, I punted and used a different one. You can find documentation on the Add-AzureAnalysisServicesAccount cmdlet here. This is used to pass our Service Principal into the Azure Analysis Services server to connect to it.
3. Notice that my Azure Analysis Services server name matches my naming convention for this entire solution. Yeah. I know. I’m pretty cool. Yours does not have to match. Mine only does since I created it solely for this demo/post. This step performs the processing operation on the database. In this example, I am performing a Process Full on the entire database. You have many other options as well. You can find more information on the Invoke-ProcessASDatabase cmdlet here. On that page, the left sidebar includes other cmdlets related to processing Analysis Services objects.
When you have finished reveling in the awesomeness of this Runbook, click on the Test Pane button, shown by the arrow in the image above.
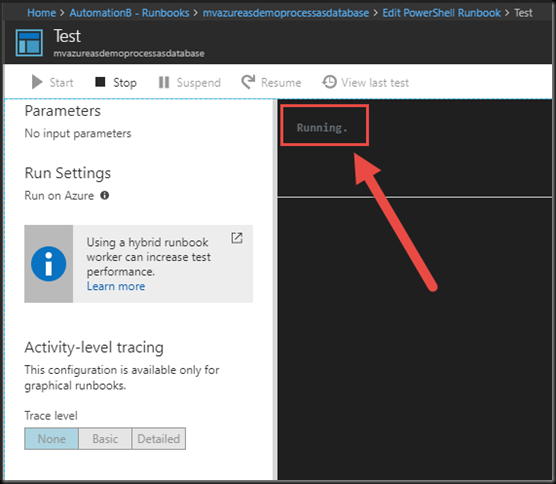
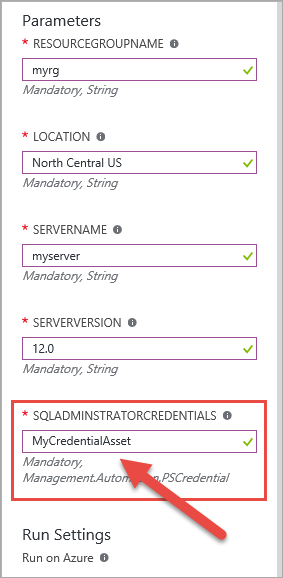
If our Runbook had actual parameters, they would show up in the Parameters section and we would be able to enter values for them. Since our Runbook is configured to just go grab what it needs from Assets, all we have to do is click Start.
Our Test run will go into queue to await its turn to run. Since we do not each have our own dedicated capacity in Azure Automation, each job needs to wait for a worker to pick it up to execute it. I have not seen the wait exceed ten seconds, personally. But not that starting a Runbook is not an instantaneous process. You can read more about Runbook execution in Azure Automation here.
Once a worker has picked it up, the status will change to Running.
Victory! Note that although this was a Test Run in the context of Azure Automation, this ACTUALLY PEROFMS THE ACTIONS in the Runbook. It does not “pretend” to call the Runbook. It executes it. In full.
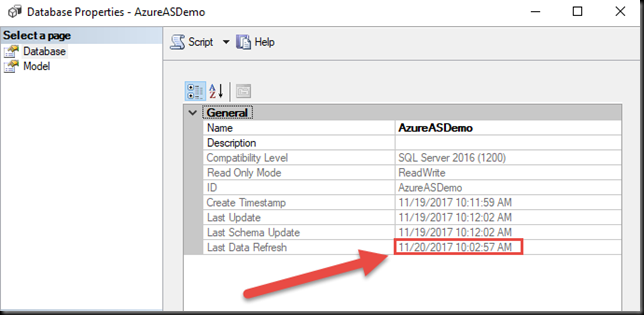
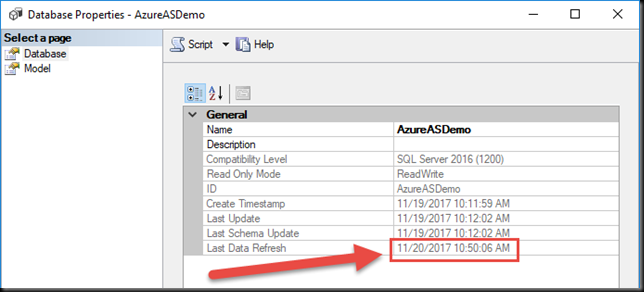
You can check the status of the database via its Properties in SQL Server Management Studio.
The Last Data Refresh status should closely match the time you ran the Test Run.
Close the Test Pane via the X in the upper right-hand corner to return to the Edit pane.
Click Publish. This will fully operationalize your Runbook, replacing the version of the Runbook that exists if it was published previously. Once it is published, we can start it manually or give it a Schedule.
Note: If you just want to look at the contents of the Runbook, use the View button. Entering Edit mode on a Published Runbook will change its status to In Edit, and it will not execute. If you do enter Edit mode by accident, and don’t want to change anything, choose the Revert to Published button to exit Edit mode and return the Runbook to the Published state.
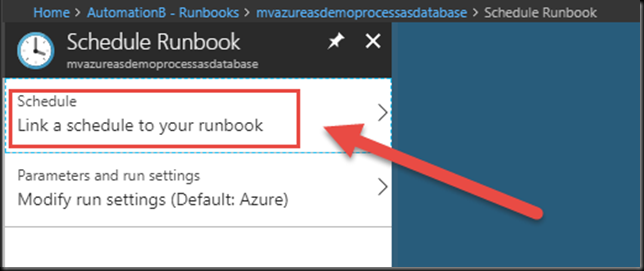
Click the Schedule button.
You can modify Parameter settings, etc, from the bottom option. In our case here, our Runbook has no parameters, so we can click to Link a schedule to our Runbook.
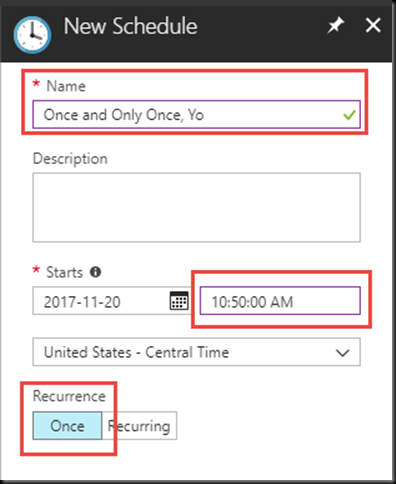
This will launch the Schedule blade. If you already have existing Schedules in your Automation Account, like “Every Monday at 6 AM” or something, those will show up here and you can choose to tack your Runbook execution onto one of those. I will just create a new one.
Give you schedule a meaningful name, ideally, one more meaningful than what I chose above. Note that you have to make sure the schedule is set to kick off at least 5 minutes into the future. Also, for this purpose, I am just choosing to have this execute Once.
Now we wait. Or, rather I wait, I guess. Anyway, back in a sec. Talk amongst yourselves. Here’s a topic: If Wile E Coyote could buy all that ACME stuff to try to catch the Roadrunner, why couldn’t he just buy some food?
And we’re back.
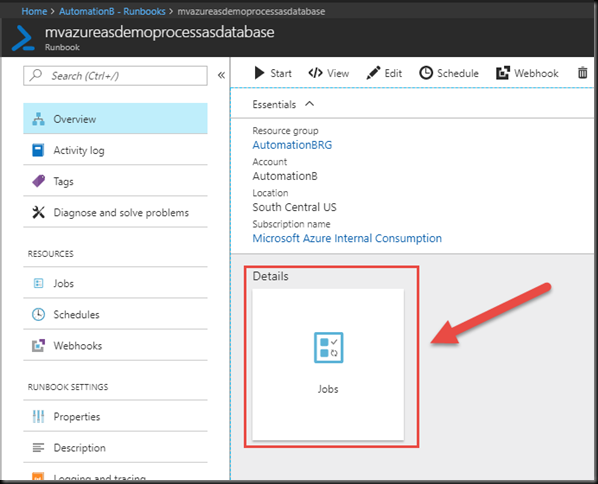
We can check the status of our scheduled Runbook execution by clicking on the Jobs button in the Runbook blade.
We can see it completed successfully. Hazzah! If we click on it, we can view more details.
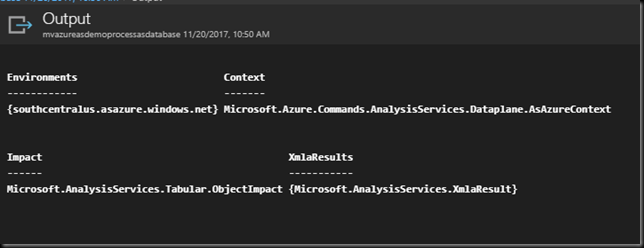
The Job Status is Completed. There are not Errors or Warnings. We can click on the Output to see the actual job Output, just like in the Test Pane.
Hazzah!
And we can see in the Database properties that the Last Data Refresh matches the time of our scheduled Runbook execution.
Hazzah! Hazzah!
Wrapping Up
There you have it. We just automated the processing of an Azure Analysis Services database using an Azure Active Directory Service Principal, PowerShell, and Azure Automation. Although this post is a bit long, the actual steps to make this happen aren’t very difficult. Hopefully, this will help walk you through trying this yourself.


